
A coffee table tray is a great way to add structure to your table ornaments and create a theme by grouping your favourite items together. The purpose of the tray can, however, be modified and if you prefer a more functional one to serve teatime goodies, simply add a more sturdy backboard that can carry the weight of cups and saucers. Personalise the look to fit in with your decor by either painting it in your chosen colour or applying a wood stain to the pine.
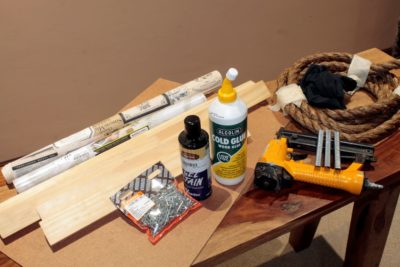
YOU WILL NEED
All of the planks can be bought and cut at BUCO. Just bring along your saw list with the measurements.
• Industrial pine cut to the following sizes:
-
- Two pieces of 700mmx70mmx20mm
- Two pieces of 400mmx70mmx20mm
• A hardboard base of 700mmx440mm (you can opt for a thicker base to make the tray more functional, since the hardboard will not be able to carry much weight)
• 1m Sisal rope, cut in half for the handles
• Wallpaper or self-adhesive vinyl of 700mmx440mm to decorate the base
• Wallpaper glue, if you are using the wallpaper
• PVA paint if you are using the wallpaper
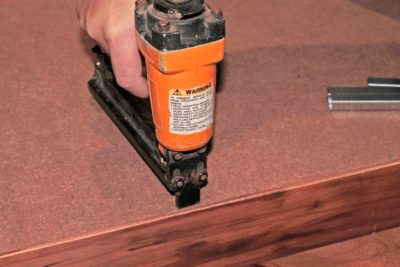
• Nail or staple gun
• Semi-clout nails for backboard attachment
• Wood glue
• 12mm drill
• Gel stain in antique oak colour or the paint of your choice.
 HOW TO
1 Cut the wood to size.
2 If you are staining it, take a wet rag and apply a few drops of the gel stain. Wipe onto the pine planks. For a darker stain, wait for the wood to dry and then add another layer. If you are painting it, apply the paint and allow to dry.
3 Once the planks are dry, assemble them to form a frame using the wood glue. Once the glue is dry, use the nail or staple gun to secure the frame together.
4 If you are using wallpaper, paint the backboard with a base coat of paint to prevent the wood from absorbing the wallpaper glue.
5 Attach the backboard to the frame with the nail or staple gun.
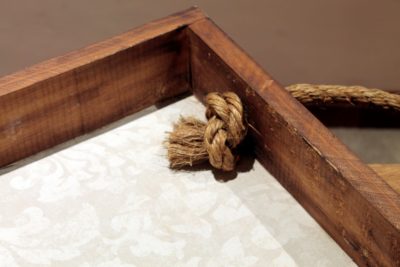 6 Measure evenly spaced locations on the frame where the handles need to be and mark them with a pencil. Drill holes.
7 Cut the wallpaper or self adhesive vinyl to the correct size and stick it onto the backboard.
8 Thread the rope through the holes and tie a knot at each end to secure the handles.
GET IN TOUCH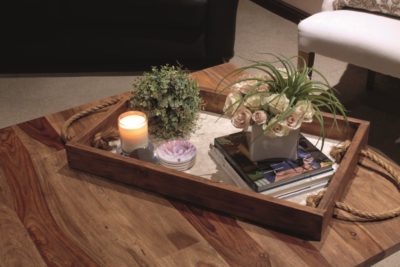
BUCO has collaborated with Get It to feature a creative project each month. If you require any assistance with your projects or need a bit of inspiration, visit Celia Swart at BUCO’s decor section.

